4. Run & Burn
The Execute page is the control center for your laser cutter. Here you connect to your machine, position the laser, and run the G-code tasks.
- warning Safety First
- Always follow laser safety guidelines when operating your machine.
- menu_book Read the Manual
- For your safety, read and follow all instructions in your laser cutter’s user manual.
- stop_circle Emergency Stop
- Make sure you are trained to stop the machine safely in an emergency.
- door_front Enclosure
- If your machine has an enclosure, always close it before starting a job.
- eyeglasses_2 Eye Protection
- Wear laser‑rated safety glasses appropriate for your laser’s wavelength.
- person_alertStay Present
- Do not leave the machine unattended while the laser is active.
- air Ventilation
- Ensure proper ventilation — laser cutting can produce toxic fumes.
- fire_extinguisher Fire Hazard
- Have a fire extinguisher within reach.
- visibility_off Eye Damage
- Even brief exposure to laser light can cause permanent blindness.
Connecting to Machine
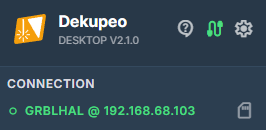
Dekupeo supports connection to GRBL-based laser cutters via USB (COM), Ethernet, or WiFi, depending on your machine.
Serial Connection (USB)
- Select the correct Serial Port and Baud Rate (usually 115200 for GRBL).
- Click Connect. The status indicator will turn green once the connection is established.
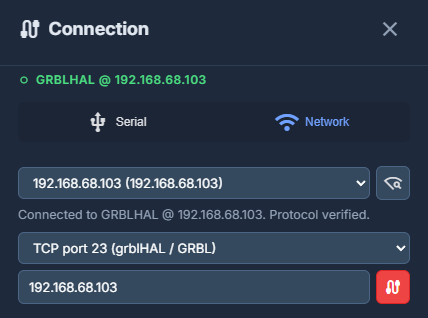
Network Connection (WiFi / Ethernet)
In the Desktop App, you can connect over the local network to machines running FluidNC or grblHAL.
- Auto-Discovery – Click the Find Machine (wifi_find) button. The software will scan your network using mDNS and list available controllers. Sometimes it may take a few retries for all devices to appear.
- Manual IP – If discovery fails, you can enter the machine's IP Address manually.
- Protocol – Choose FluidNC (WebSocket) or TCP/Telnet (port 23) depending on your controller's firmware. If you don't get it right, don't worry, just select one and try connection. The software will instruct you in case of protocol mismatch.
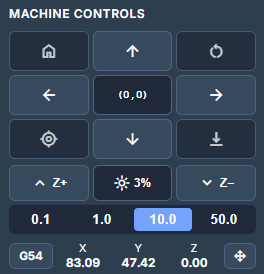
Machine Controls (Jogging)
Use the jog controls to move the laser head manually:
- X and Y Arrows – Move the laser across the material.
Keyboard shortcut: Arrow keys - Z Arrows – Move the laser head up or down (for machines with motorized Z-axis).
Keyboard shortcut: Page Up / Page Down keys - Home Machine (home) – Triggers the $H homing sequence to find the machine's physical limits using limit switches.
Keyboard shortcut: Home key - Soft Reset (restart_alt) – Sends a Ctrl-X command to the controller to clear errors or stop a movement immediately without disconnecting.
Keyboard shortcut: Ctrl+X - Step – Choose how far the laser moves with each click (0.1 mm to 50 mm).
Keyboard shortcut: Ctrl + Left and Right keys - Set Zero (my_location) – Set the current position as the temporary work origin (X=0, Y=0). This is usually where the bottom-left corner of your project starts.
Keyboard shortcut: Ctrl+0. - Go to Origin (0,0) – Move the laser head to the current work origin.
Keyboard shortcut: 0. - Go to Position (drag_pan) – Enter specific X, Y, Z coordinates to move the laser head relative or absolute or set specific offset from the work origin in selected coordinates.
- Coordinate System (G54 etc.) – You can select several coordinate systems (G54, G55, G56, etc.). It might be useful if you use multiple fixtures. G53 represents the machine coordinate system given by homing, so its offset or origin cannot be changed.
It can be more intuitive and faster than using the keyboard, especially setting the origin.
Running G-code
Once your G-code is loaded (via the Generate page or manual upload), you can run it. Only the active G-code file will be executed. You can switch between files using the file selector at the top of the page.
- 3D Viewer & Simulation – Use the viewer to verify the toolpaths. You can rotate (left-mouse button), zoom (scroll wheel), and pan (right-mouse button) to inspect the design. The 3D viewer supports Simulation, allowing you to visualize the laser's path before running the actual job.
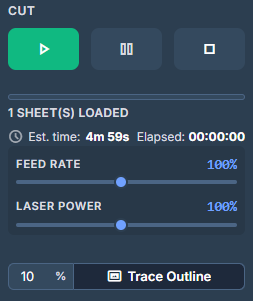
- Outline (Frame) – Click the Outline button to move the laser head along the bounding box of your job (with the laser off or at very low power). This helps you verify that the design fits on your material and is correctly positioned.
- Start Job – Click the Play button (play_arrow) to begin the cutting/engraving process.
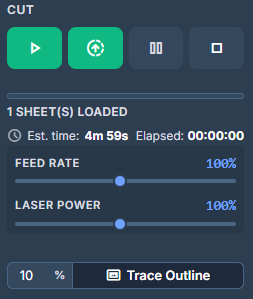
If you're connected via Wi-Fi or Ethernet and SD card support was detected, by pressing (arrow_upload_progress) you can upload the G-code to the machine's internal storage and run it directly from there, which can improve performance and reduce stuttering for complex jobs. - Pause/Stop – You can pause the job at any time or stop it completely if you notice an issue.
- Overrides - Allows you to adjust feed rate laser power during gcode execution.
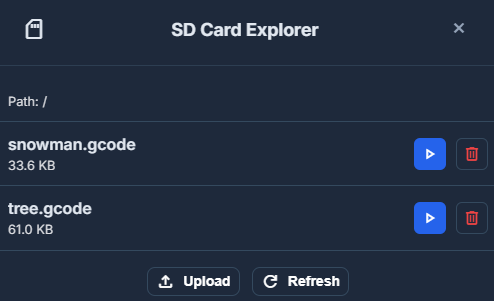
SD Card Explorer
If machine compatibility (GrblHal, FluidNC) is detected during connection, you can use the SD Card Explorer to manage files on the machine's internal storage. Possible actions include:
- View stored files on the SD card.
- Run G-code from stored files on the SD card.
- Delete files.
- Upload G-code files from your computer to the SD card (if connected via Wi-Fi or Ethernet).
Job Queue
In the top right corner of the page, there is a Job Queue icon (bookmark_stacks) which opens the Job Queue modal. From here, you can manage the list of pending tasks:
- Select a job to see its details.
- Load the job directly to the Execute page.
- Load & Delete to load the job for execution and remove it from the queue simultaneously.
- Delete a job if it is no longer needed in the queue.
Fleet Mode
If you are managing multiple machines, Fleet Mode provides tools for efficient workshop oversight:
- Active Machine Selection – Quickly switch between different machines in your fleet to control them or monitor their status.
- Camera Overview – Provides a live visual bird's-eye view of all connected machines with cameras, allowing you to monitor the physical progress of your entire fleet from one screen.
Advanced Features
- Z-Probe (vertical_align_bottom) – If your machine has motorized Z axis and a Z‑probe, you can use it to automatically locate the top of the workpiece or the machine bed and set an accurate Z‑zero.
- Console – A terminal where you can see the raw communication with the GRBL controller and send manual G-code commands.
- Run from SD card to bypass USB/Wi-Fi latency.
- Direct COM stream latency might be better than direct Wi-Fi stream.
- Lower DPI or reduce Engraving/Travel speeds in the Generate page to simplify the G-code stream.
You should now be able to prepare parts for laser cutting, nest them on your material, generate G-code and send it to your laser cutter in Dekupeo. Continue learning with tutorials or case studies or read more about Dekupeo Settings.