Dekupeo Tutorials
Product Library
If you use your laser cutter for repeated manufacturing tasks, Dekupeo Product Library can make your life easier. It allows you to organize your parts and reuse when needed, without the need to import the same files over and over again.
Got orders for 5 boxes, 20 keychains and 10 name tags today? Just select them in the library. Dekupeo will nest them on the sheet automatically and you can start cutting. You can even import products to be fetched from the library as a CSV file, e.g. from your e-commerce platform.
Product Library Structure
The library is organized as a simple folder structure, where each folder represents Bill of Materials (BoM). It can contain another folders or individual parts.
To specify quantity, use _x# suffix to your part or folder names, where # is the quantity, e.g. file side_2x.step means that the BoM contains 2 sides.
To prepare your library, just create the folders representing different BoMs and organize your parts into them.
Example of the library structure with some boxes, name tags and keychains:
Plywood parts 5 mm
- boxes
-- small_box
--- lid.step
--- bottom.step
--- side_2x.step
--- front.step
--- back.step
-- candle_box
--- lid.step
--- bottom.step
--- side_2x.step
--- front.step
--- back.step
- name_tags
-- oval.dxf
-- rectangular.dxf
-- sharp.dxf
- keychains
-- oval.dxf
Product Library Definition
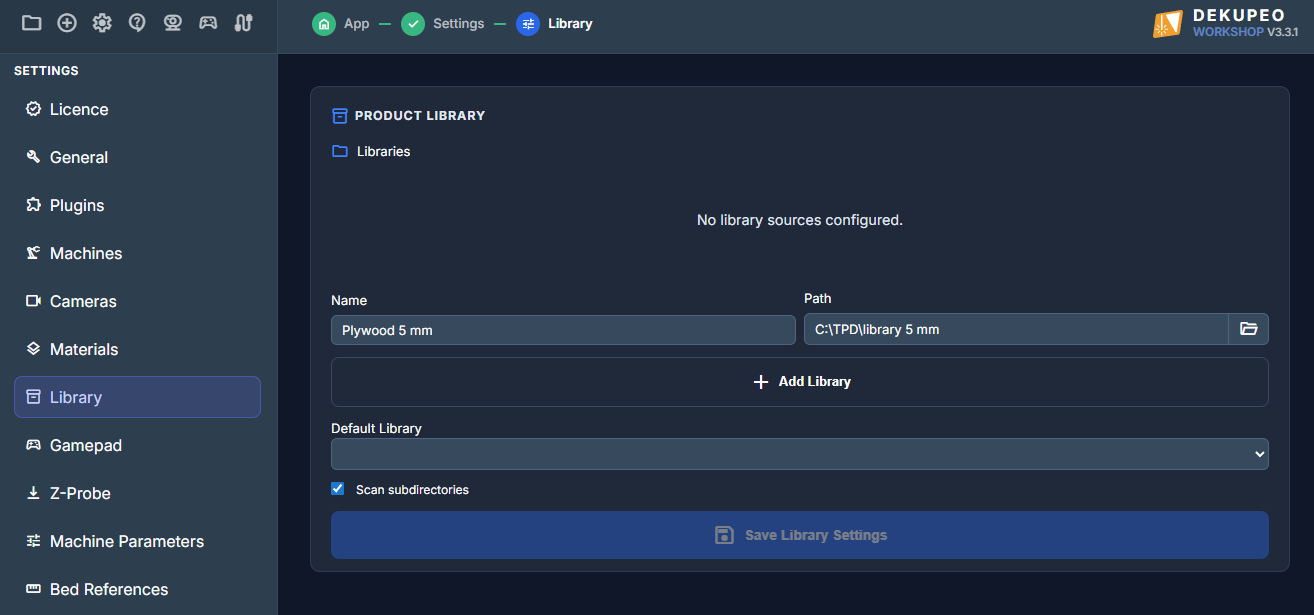
Once your folder structure is ready, you can add it as a new library to Dekupeo. It is done in Settings > Library. Just type in name, select Path and click Add Library and do not forget to Save Library Settings.
If you need to modify the library structure, just update the folders and files accordingly in your library folder. It is refreshed each time you open the library.
Using the Product Library
With defined library, you can use the Library button in Upload & Setup to add library items to your project. It can be done manually or by importing a CSV file.
Manual Selection
Let's say you want to cut 3 small boxes and 5 oval name tags from our example library. Open the library, find the products, select them by checking the checkboxes and define the quantity.
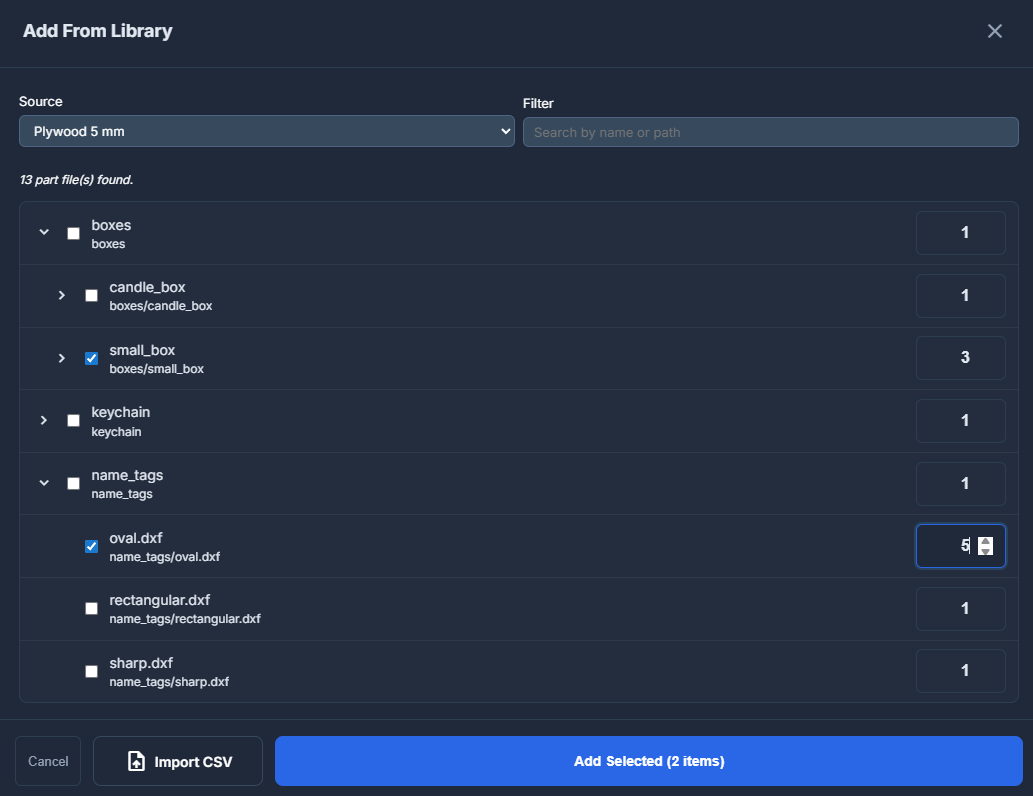
Click Add Selected to add the items to your project. In our example, following parts will be added to the project:
- 3x bottom.step
- 3x front.step
- 3x lid.step
- 3x back.step
- 6x side_2x.step
- 5x oval.dxf
CSV Import
You can also use a csv file to select products from the library. The CSV file should have the following format:
part;qty
small_box;3
keychain/oval;5
You can use comma (,) or semicolon (;) as a separator, but never mix them in the same file. The header line is optional.
If your library contains two parts with the same name in different folders, you have to specify the folder path in the CSV file, e.g. keychain/oval.
Once the file is ready, click import, select the csv file and click Open. Products from the library will be selected accordingly.
Engraving library parts
You can attach engraving files to parts imported from the library manually after the import. If you wish to have engravings imported with your parts, you can add the vector engraving data to ENGRAVE layer in your SVG or DXF files.