Dekupeo Tutorials
Setting up a Material for Laser Cutting
You have your laser cutter ready and a piece of material to cut or engrave. What to do next? Follow this tutorial to set up a new material for laser cutting with Dekupeo.
Preparation
Turn on your laser cutter and connect to it. Ensure that you know how to operate the machine safely (laser safety goggles, ventilation, etc.).
Place the material on the laser bed. It should be flat. If it bends, use clamps or weights to hold it down.
Focus Laser
Move the laser head above the material and adjust the focus according to the material thickness. Follow the manufacturer's instructions for your specific laser cutter model. Usually it is done by adjusting the height of the laser head with integrated focus tool.
Set Origin
Set the origin (0,0) point for your cutting job. Move the laser head to the desired position (typically the bottom-left corner of your sheet) and set it as origin in the machine controls on Run & Burn page via button.
Cut Test
Cut test helps you determine the optimal cutting parameters for your material. It creates matrix of test cuts with varying speeds and passes.
You can generate a cut test in Dekupeo via the menu:
Create menu > Generate Test - Cut Test.
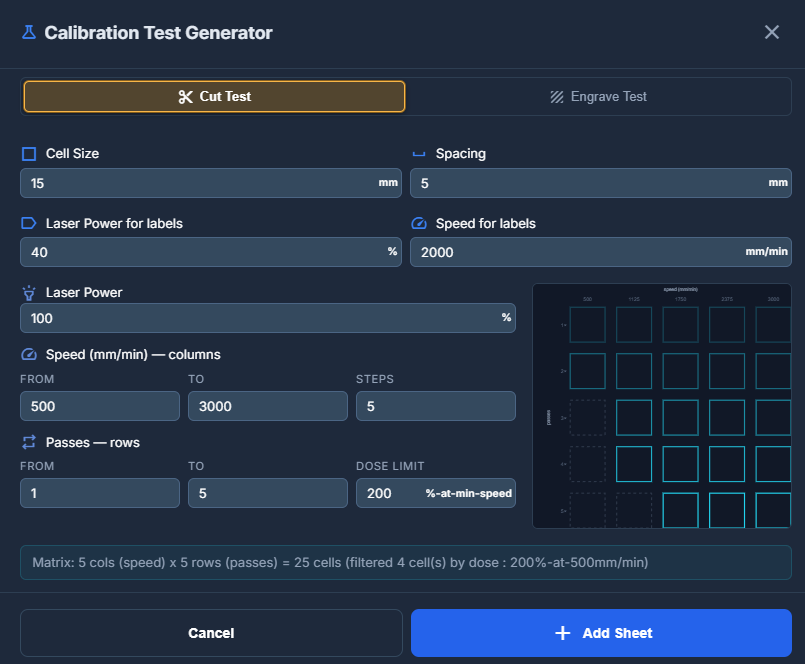
For the first try, you can use default settings and you will see if you need to move slower or faster based on the results. If your laser does not cut through the material, try increasing the power, reducing the speed or adding more passes.
Once you are satisfied with test parameters, add the test by pressing Add Sheet button, then move to Run & Burn page and send the test to the laser cutter. From the test result, choose the optimal settings (speed, power, passes) for your material or re-run the test with adjusted parameters if needed.
How to Read the Cut Test Matrix (Finding the Sweet Spot)
When your laser cutter finishes the test matrix, look closely at the cuts (a magnifying glass or your smartphone's macro camera helps immensely). You are looking for the optimal balance between thermodynamics and geometry based on three distinct zones:
- Under-vapoized Zone (Too Fast / Too Many Passes): The laser did not cut all the way through, or the bottom edge is barely scored. If you see that a square required 8 or 10 very fast passes to cut through, it is a bad choice. At extreme speeds, the energy density drops below the vaporization threshold. Instead of turning wood into gas, the laser just bakes the fibers, creating a lot of soot and a wider, tapered V-shaped gap.
- Over-cooked Zone (Too Slow): The square falls out easily, but the edges are jet black, heavily charred, or look "bitten into." Moving too slowly gives heat enough time to bleed sideways into the surrounding wood fibers (thermal conduction), destroying the edge quality and creating excessive charcoal.
- The Sweet Spot (The Winner): Look for the square that cut completely through with the highest possible speed and the lowest number of passes (ideally 1 to 3 passes for typical diode lasers). The edges should be clean, light tan to medium brown, and the top and bottom kerf width should be almost identical.
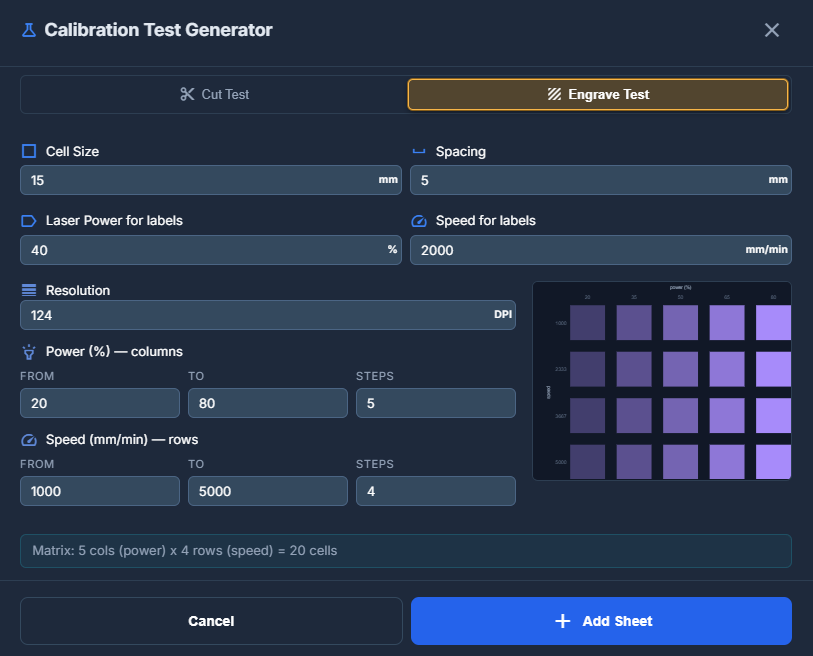
Engrave Test
Engrave test is similar to cut test, but it is focused on engraving performance. It creates a matrix of engraved squares with varying speeds and power.
Adding a New Material Preset
Once you have determined the optimal cutting and engraving parameters for your material, you can save them as a new material preset in Dekupeo for easy reuse in future projects. To do so, go to Settings > Materials, click new Material and fill in the fields with the parameters you found in the tests.